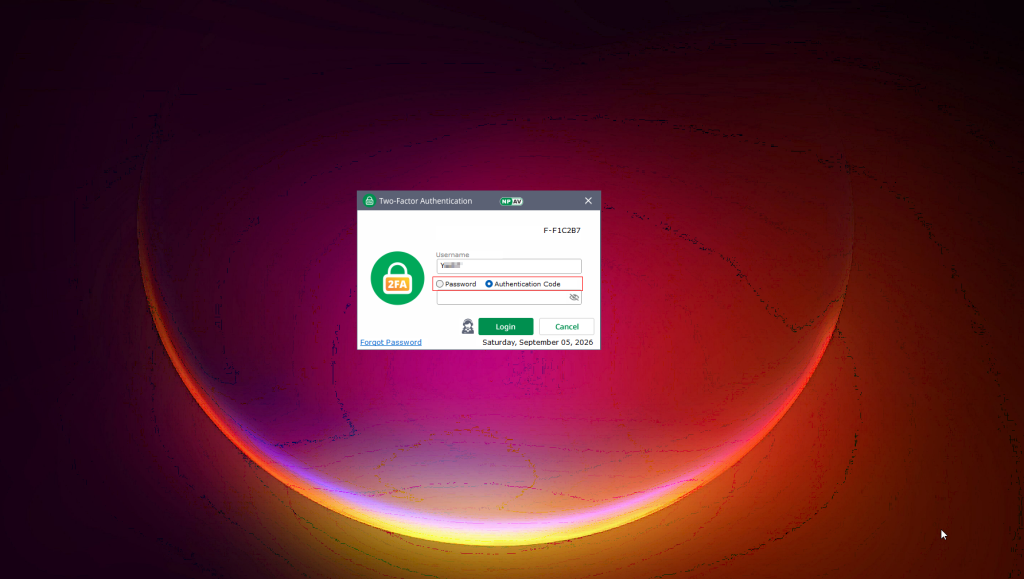
Two-Factor Authentication (2FA) adds an additional layer of security for Windows logins on managed endpoints. It is enabled by editing the policy applied to the target endpoint from the Policy Management section of the EPS Web console. Follow the steps below to enable and configure it.
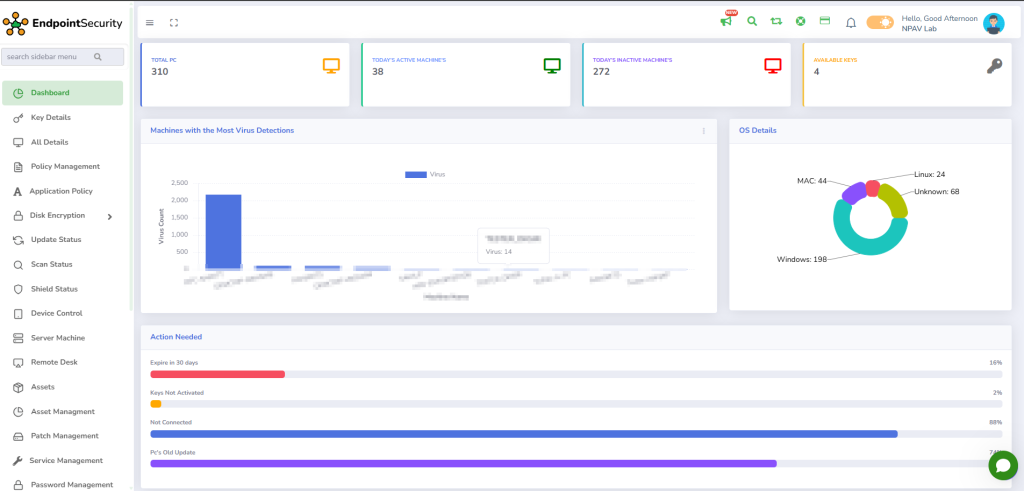
Step 1: Open Policy Management
From the main dashboard, click “Policy Management” in the left sidebar menu.
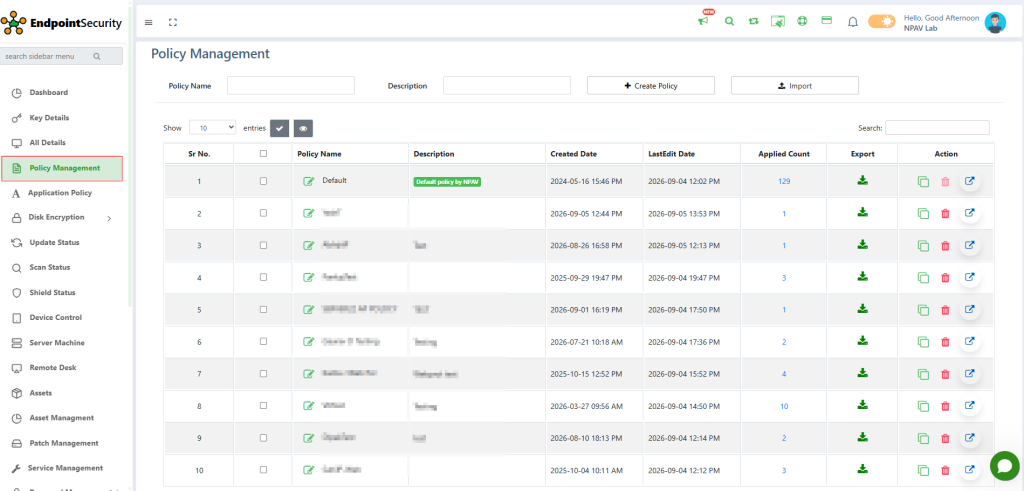
Step 2: Select the Policy
In the Policy Management list, locate the policy applied to the endpoint on which 2FA needs to be enabled, and click the edit (pencil) icon against that policy to open it.
Step 3: Open the Shield Tab
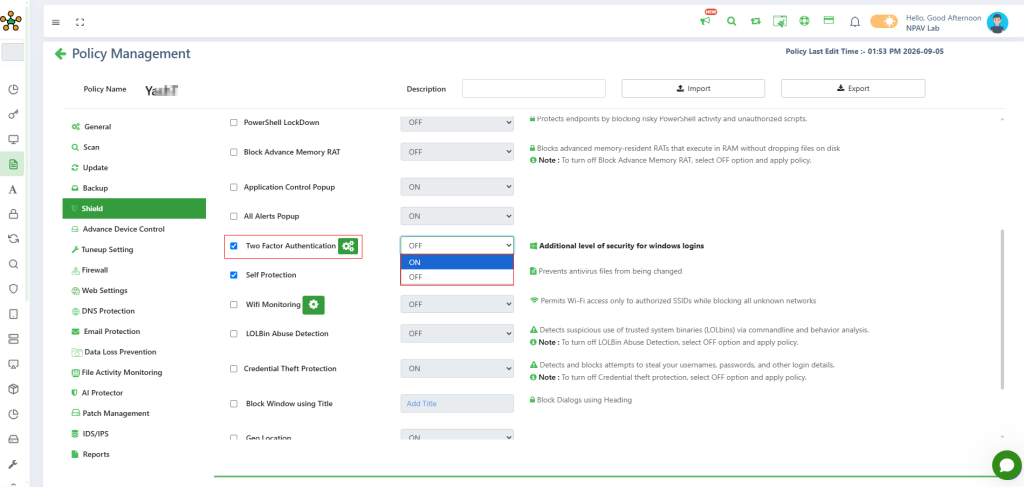
On the policy configuration screen, select the “Shield” tab from the left panel. Under Shield settings, select the checkbox next to “Two Factor Authentication” to enable the option.
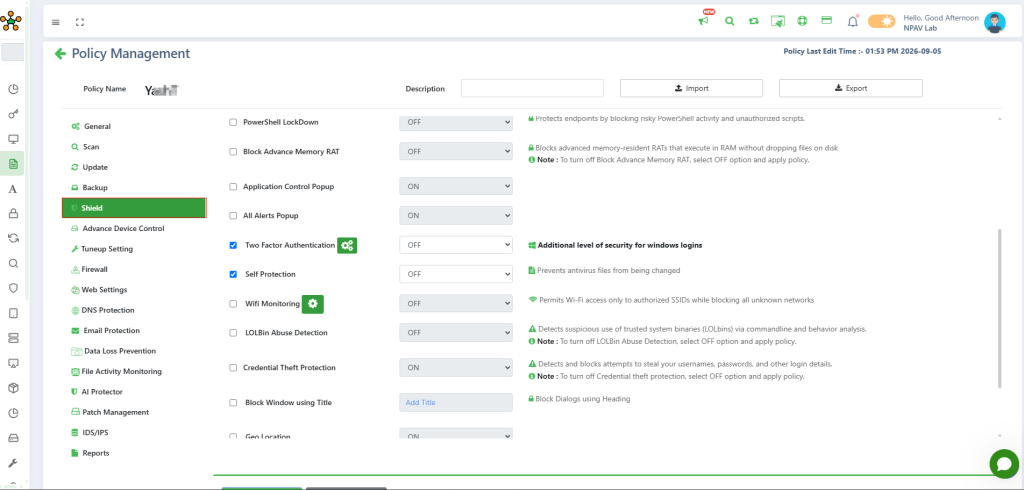
Step 4: Turn On Two Factor Authentication
Click the dropdown next to “Two Factor Authentication” and select “ON” from the list.
Step 5: Configure the 2FA Skip Counter
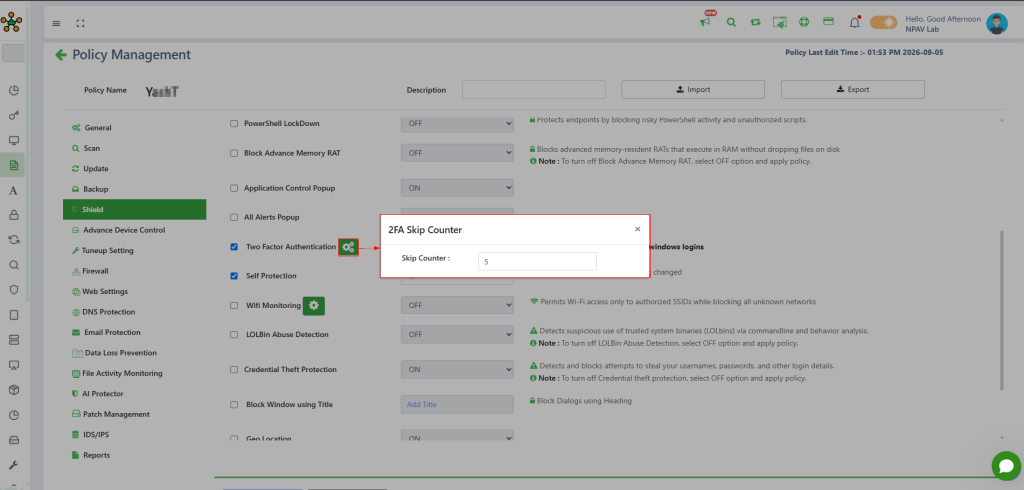
Click the settings (gear) icon next to “Two Factor Authentication” to open the “2FA Skip Counter” window. In the Skip Counter field, enter the number of times the end user is allowed to skip the 2FA setup prompt on their machine (Max 5 Skips), then close the window.
Step 6: Save and Apply the Policy
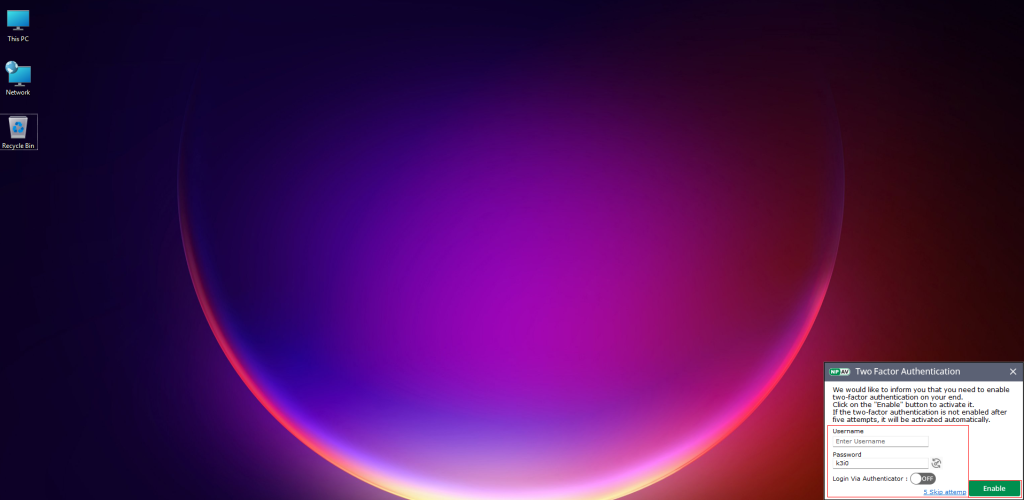
Save and apply the policy. Once applied, a Two Factor Authentication popup appears on the end user’s machine prompting them to enable 2FA. On this popup, the end user can:
- Enter a Username and Password — the refresh icon next to the Password field generates a new password, or
- Turn “Login Via Authenticator” ON (optional) to use an authenticator app instead of a password.
The user then clicks “Enable” to complete the setup.
Step 7: Complete Authenticator App Setup (if “Login Via Authenticator” is ON)
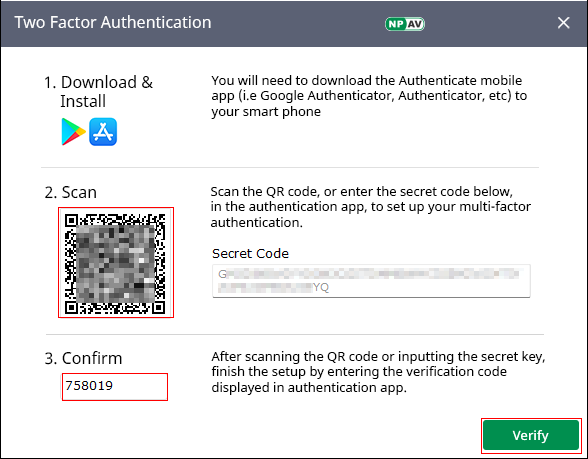
If the end user turns “Login Via Authenticator” ON before clicking Enable, a setup screen appears with three steps: download and install an authenticator app (such as Google Authenticator), scan the QR code — or enter the secret code shown — in that app, then enter the verification code the app generates and click “Verify”.
Step 8: Confirm the Authenticator Setup
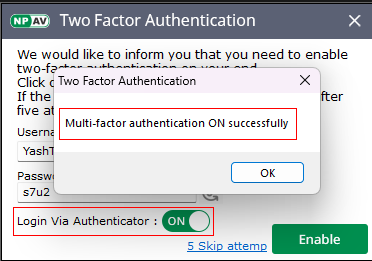
After the code is verified, a “Multi-factor authentication ON successfully” confirmation appears on the setup popup, confirming the authenticator has been linked to the endpoint.
Step 9: Subsequent Logins on the Endpoint
From this point on, the Two Factor Authentication prompt on that endpoint lets the end user choose between “Password” and “Authentication Code” (when an authenticator has been configured) to log in.