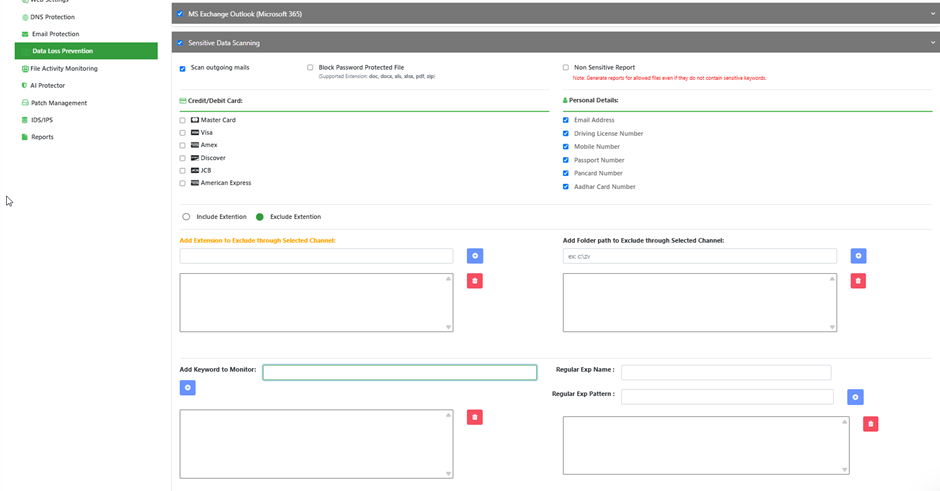
1.1 Where to Configure
Policy Management → Edit Policy → Data Loss Prevention → MS Exchange Outlook (Microsoft 365) panel
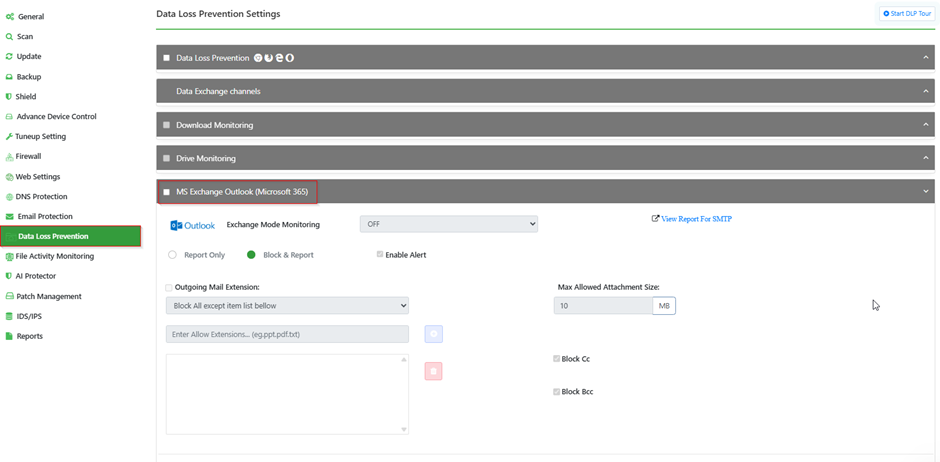
1.2 Exchange Protection Settings
Setting | What it does |
| MS Exchange Outlook (Microsoft 365) checkbox | Master switch for entire setting. |
| Exchange Mode Monitoring | ON/OFF toggle for active monitoring of the Exchange mail flow. |
| Action: Report Only / Block & Report | Report Only logs violations but lets mail through. Block & Report stops the mail and logs it. |
| Enable Alert | Shows a popup notification to the client when a mail is blocked. |
| Outgoing Mail Extension | Allow/block-except-exception logic applied to Exchange outgoing attachments (extension or file name). |
| Max Allowed Attachment Size (MB) | Outgoing mail with attachments larger than this limit is blocked. |
| Block Cc | Blocks the mail outright if a Cc recipient is present. |
| Block Bcc | Blocks the mail outright if a Bcc recipient is present. |
1.3 Step-by-Step: Configuring Exchange Protection
- Go to Policy Management → Edit Policy → Data Loss Prevention → MS Exchange Outlook (Microsoft 365).
- Tick the main checkbox on the panel.
- Set Exchange Mode Monitoring to ON.
- Choose Report Only or Block & Report, and tick Enable Alert if end users should be notified.
- If restricting attachments, tick Outgoing Mail Extension, pick a mode, and add extensions/file names to the list.
- Set Max Allowed Attachment Size (MB), and tick Block Cc / Block Bcc if required.
Save/Update the policy and push it to the target client group.
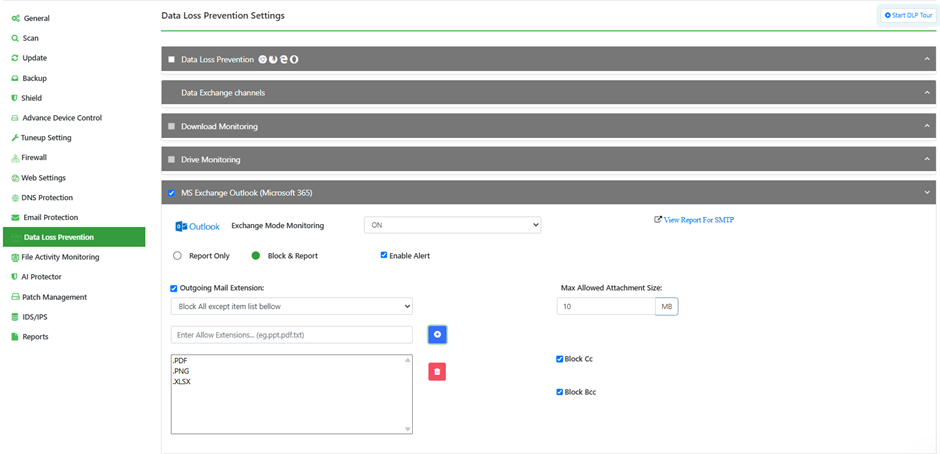
1.4 Outgoing Domain Restrictions
This is the Exchange module’s equivalent of Spam Protection — it restricts outgoing mail to a whitelist.
1.5 Step-by-Step: Configuring Outgoing Domain Restrictions
- tick “Outgoing Domain Restrictions.”
- Choose the mode from the dropdown (e.g. Block All Except Exception).
- Add allowed domains under “Enter Domain for Allow…” and/or allowed addresses under “Enter Email id for Allow…” — both lists can be used together.
- Save/Update the policy.
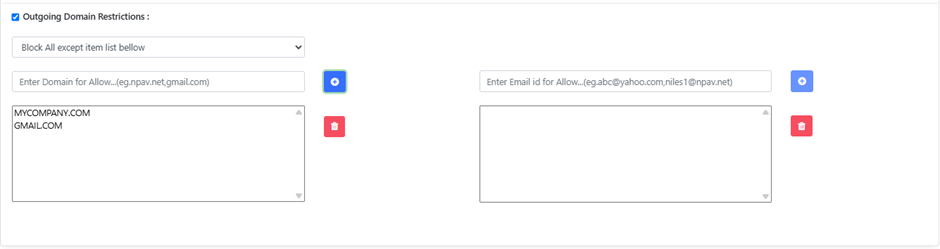
1.6 Sensitive Data Scanning (Outgoing Mail)
This panel sits under the same Data Loss Prevention page but is shared across several DLP channels, not just Exchange mail. For email-protection purposes, only the fields below are in scope:
| Setting | What it does |
| Scan Outgoing Mails | Master switch that applies sensitive-data scanning to outgoing mail. |
| Personal Details categories | Email Address, Driving License Number, Mobile Number, Passport Number, Pancard Number, Aadhar Card Number — tick any that should trigger a block/flag if found in outgoing mail. |
| Credit/Debit Card categories | Master Card, Visa, Amex, Discover, JCB, American Express — tick any card types to detect. |
| Add Keyword to Monitor | Free-text keywords that also trigger detection when found in outgoing mail. |
1.7 Step-by-Step: Configuring Sensitive Data Scanning for Outgoing Mail
- Tick the main “Sensitive Data Scanning” checkbox to expand the panel.
- Tick “Scan outgoing mails.”
- Under Personal Details and/or Credit/Debit Card, tick the categories that should be detected.
- Optionally add free-text keywords under “Add Keyword to Monitor.”
- Ignore the remaining fields on this panel — they belong to other DLP channels.
- Save/Update the policy.