Enterprise cloud BKP :
– It helps protect data from being lost due to accidents, hardware failures, or disasters.
– Enterprise backup is a system used by businesses to make copies of their important data and information.
– Many systems can automatically create backups on a regular schedule, so you don’t have to remember to do it manually.
– If something goes wrong, like a data loss, the backup allows the business to quickly restore everything.
– Backups are usually encrypted to keep sensitive information safe from unauthorized access.
– Regular checks are done to make sure that the backups work and that data can be restored when needed.
– NP Enterprise Cloud Backup viewer is useful for viewing the Statistics of files that are stored on Cloud
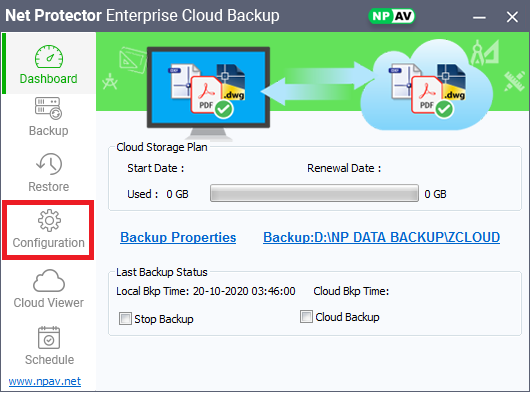
Dashboard :
– Step 1: Open the Net Protector and click on System Tuner.
– Select the Enterprise Cloud Backup Option. Dashboard of it will appeard.
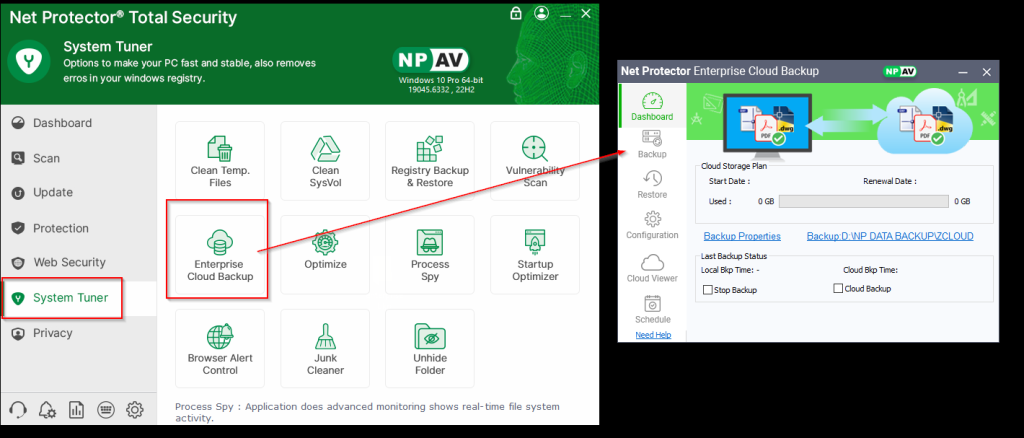
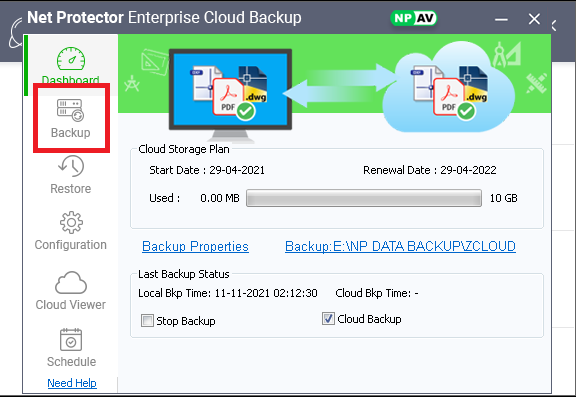
– On Dashboard it shows cloud storage plan : start date , renewal date , storage used etc.
– Backup properties hyperlink redirected to properties of backup folder.
– Backup hyperlink redirected to folder where your backup folder saves.
– In last bkp status section local bkp time , cloud bkp time
& gives two check boxes stop bkp if ticked that stops auto bkp
& cloud bkp if ticked then take cloud bkp automatic after local bkp completed.
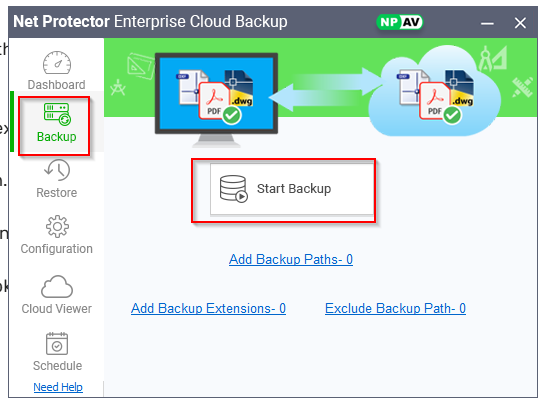
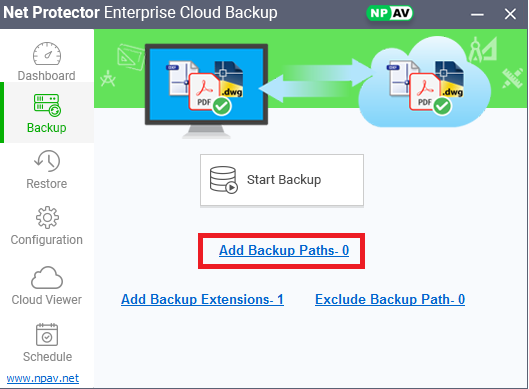
Backup :
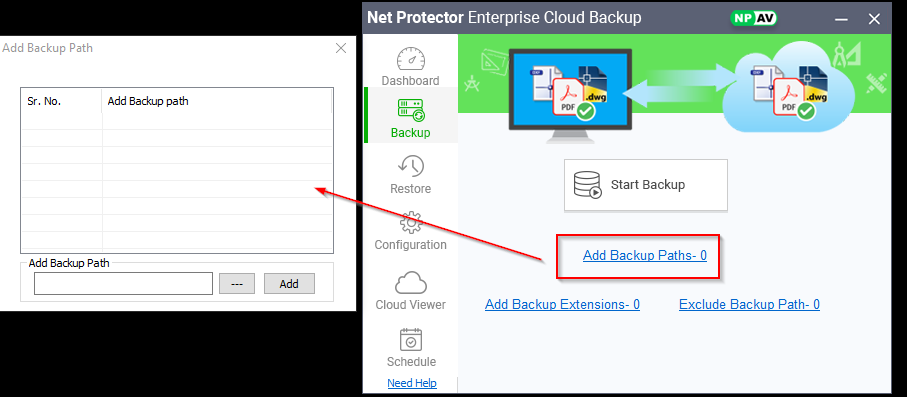
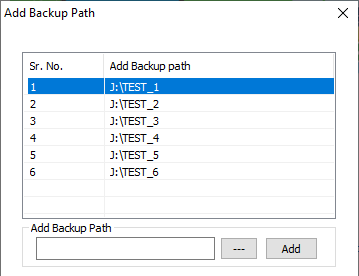
– Add backup paths from add bkp path hyperlink, add any drive , folder , file path will added into list.
How much path u will add it , count shows on hyperlink.
If u want to remove that path select any path or particular path & right click on it , shows two options i.e. remove all & remove from include bkp list.
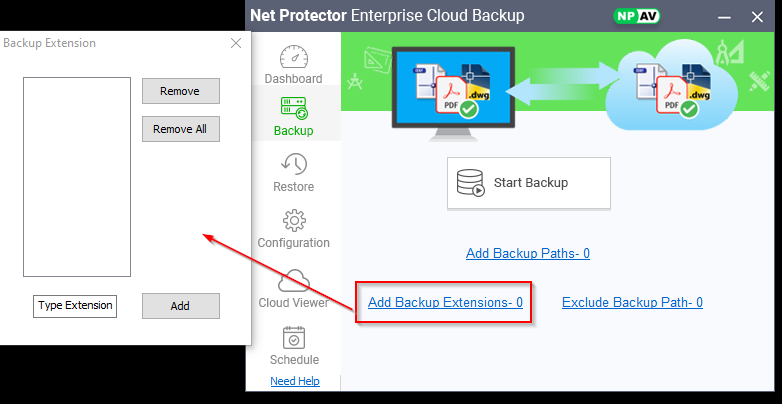
– Add any extention from add bkp extensions hyperlink , type extension in type extension box & add it.
– Delete any or all extensions from remove or remove all option.
How much extensions u will add in it , count shows on hyperlink.
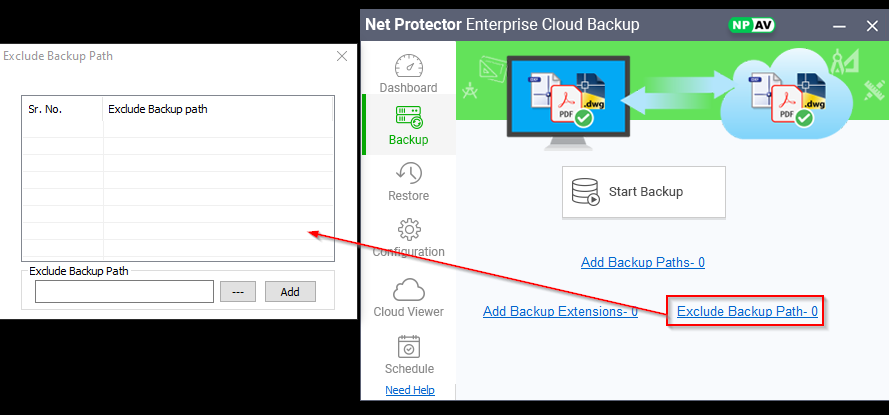
– If u want to exclude any bkp path from bkp put it in exclude bkp path hyperlink.
How much path u will add in it , count shows on hyperlink.
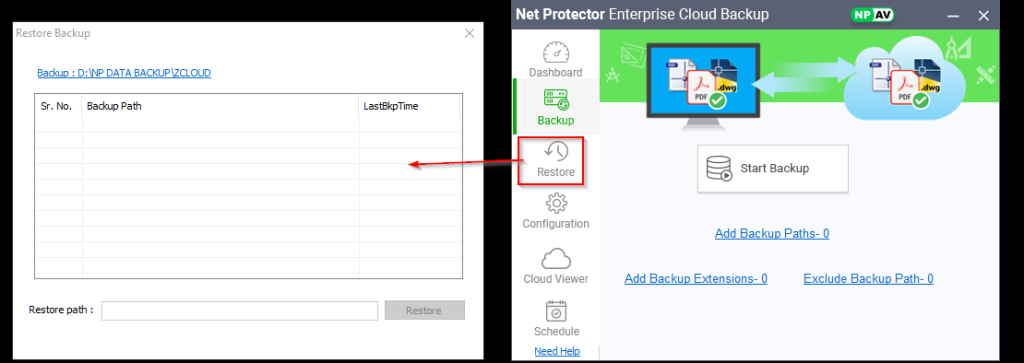
Restore :
– After only (first) any bkp done, data shows in restore bkp.
– In restore window backup shows that is which backp , restore data will available ,
– Under backup path data shows of completed bkp , double click on that path will redirected to that path & also shows lastbkp time shows.
– Select restore path where u want to restore ur data & click on restore.
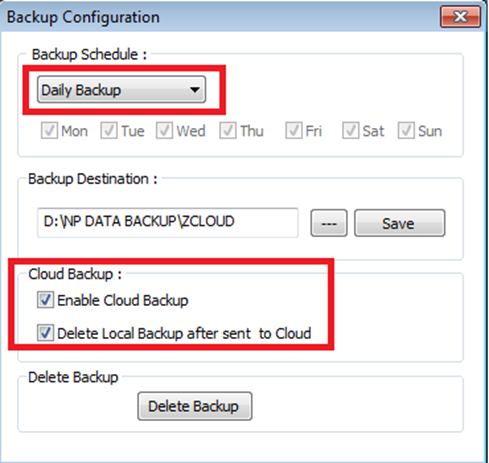
Configuration :
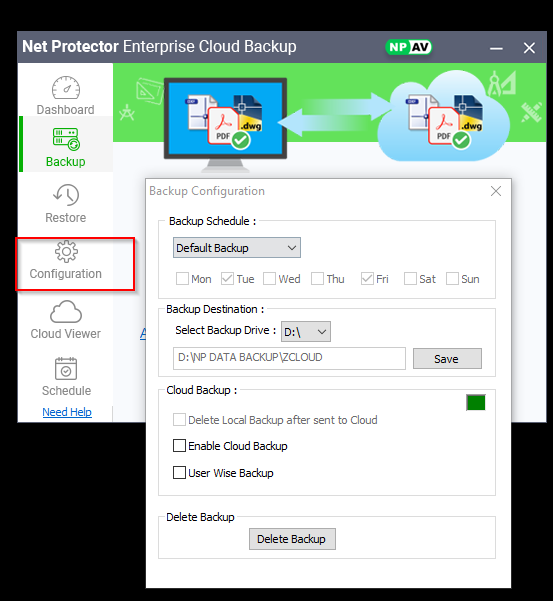
– Select bkp schedule which have 4 types are custom backup in which select day on ur own on which u want to take bkp
– Daily bkp in which daily bkp will execute automatically
– Default bkp in which tuesday & friday two days are selected for auto bkp
– Weekly bkp in which only in friday auto bkp will perform by default.
– Select bkp drive under select bkp destination in which drive u want to put bkp & save it.
– under cloud bkp cloud bkp will enabled after enabled cloud bkp checkbox,
– user wise bkp taked by cloud bkp if u select user wise bkp that means how much users u have in ur machines
– After enabled cloud bkp delete cloud bkp after sent to cloud will also enabled that means after local bkp complete then
cloud bkp starts & after cloud bkp ends it automatically deleted local bkp which consumes storage on our physical drive
– After click on delete bkp option delete bkp window will be opened then choose bkp which u want to delete & delete it.
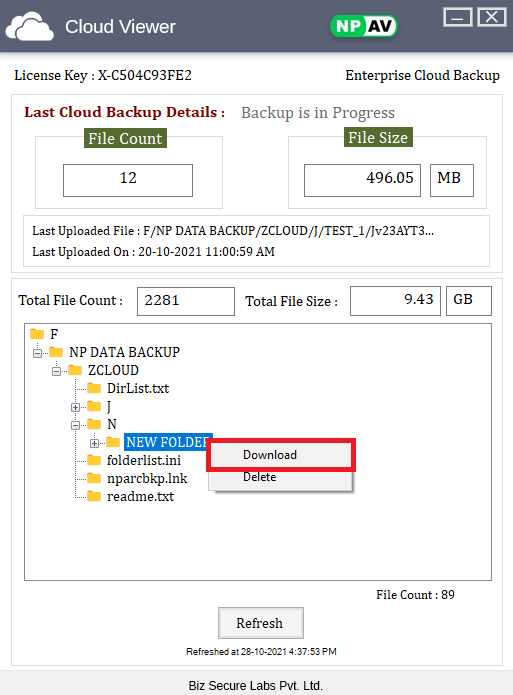
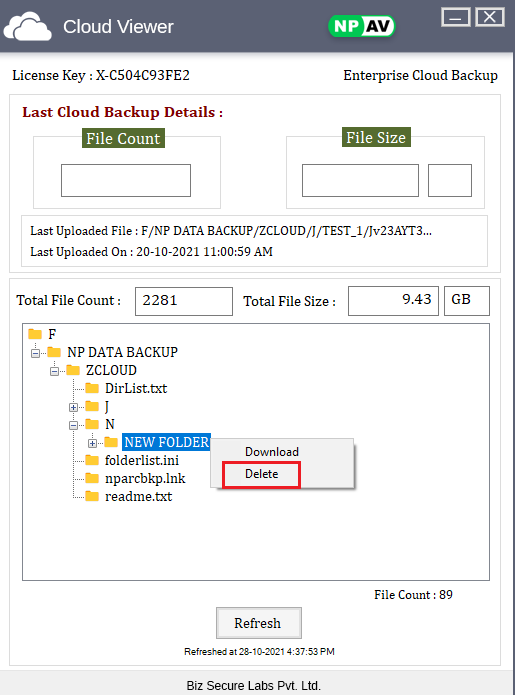
Cloud viewer :
– After clicked on cloud viewer login window will opened.
– Entered ur login credentials i.e. NPAV key , mobile no , 5 digit secure pin which u have sened via email after u purchased cloud bkp plan & registered
How to Upgrade to Cloud Backup?
Follow the below steps to Upgrade on Cloud Backup:
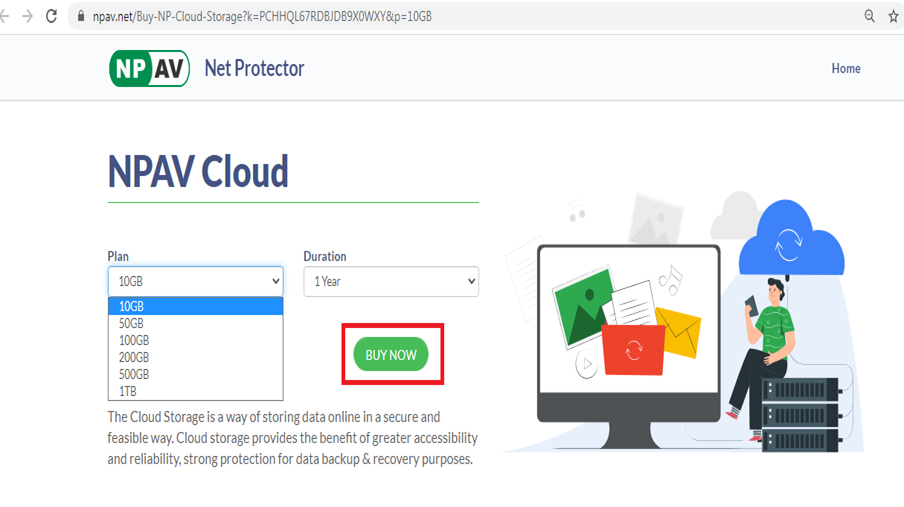
Step 1: Click on Buy Storage
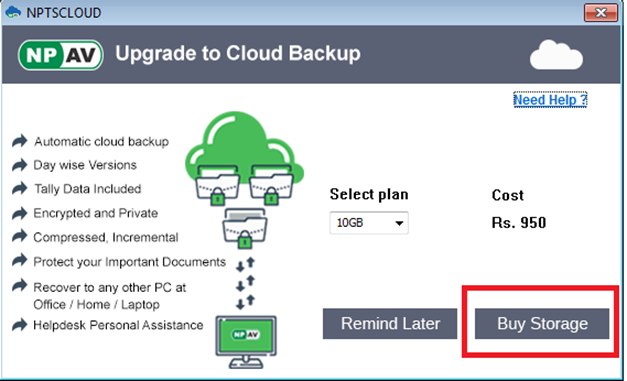
Step 2: Select the Plans if you want to change
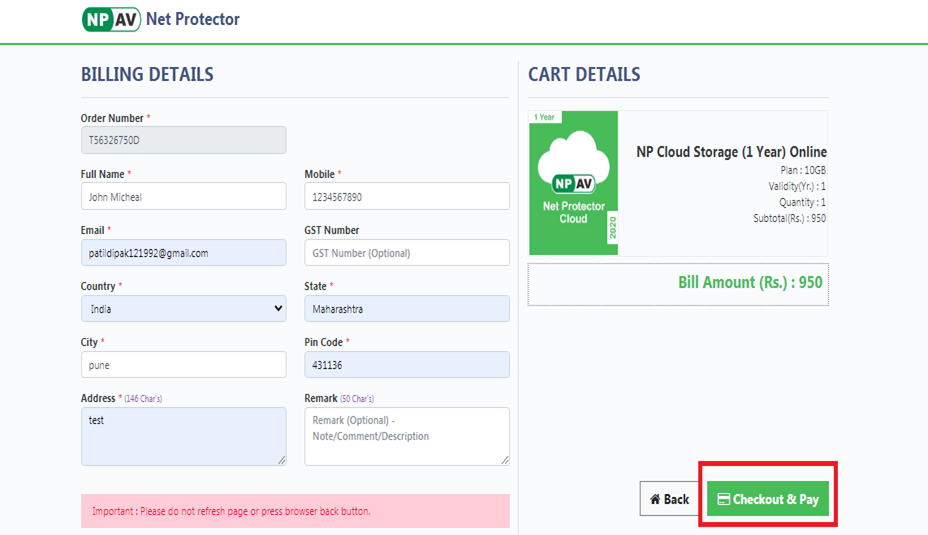
Step 3: Fill all the details & click on Checkout
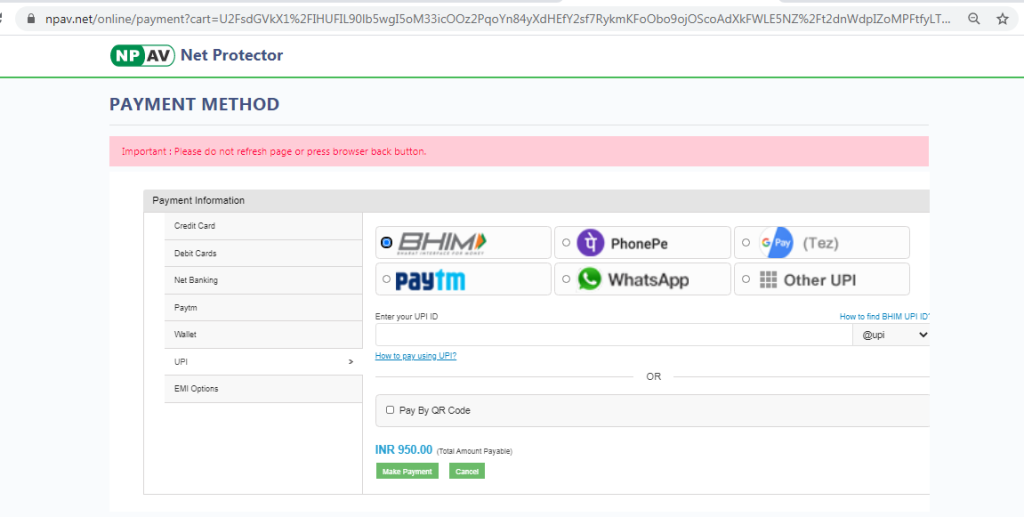
Step 4: Select the payment method & click on Make Payment button
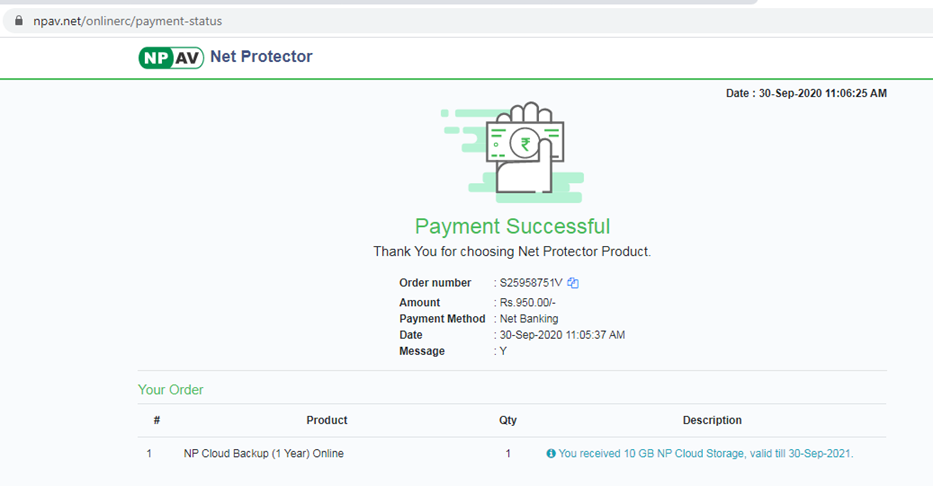
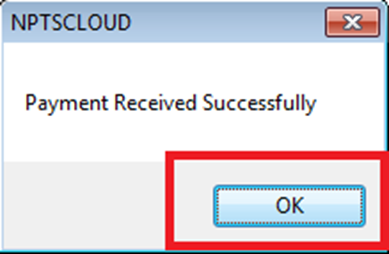
Step5: Payment is Successful
Step 6: Payment Received Dialog Shows
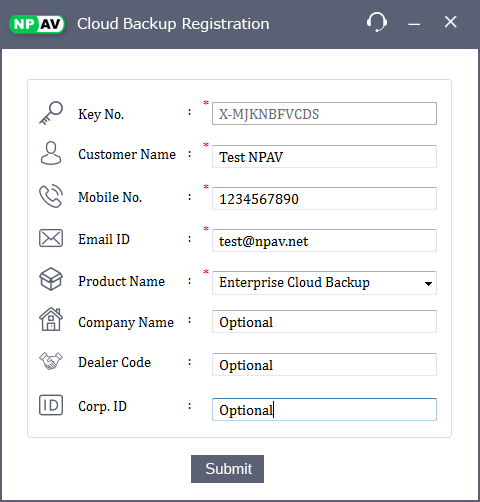
Step 7: Fill all the details & click on submit
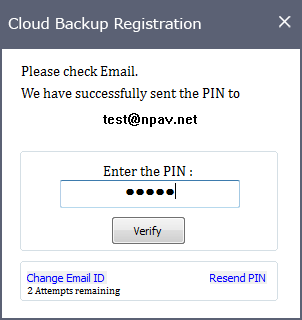
Step 8: Enter the PIN Received on your email-id & click on Verify button
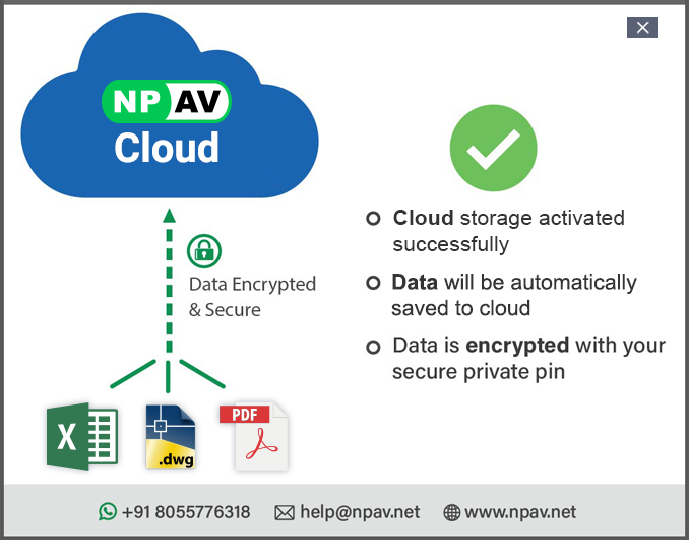
Step 9: Cloud Storage Activated Successfully
Step 10: Later click on Configuration Menu
Step 11: Select schedule & enable cloud backup
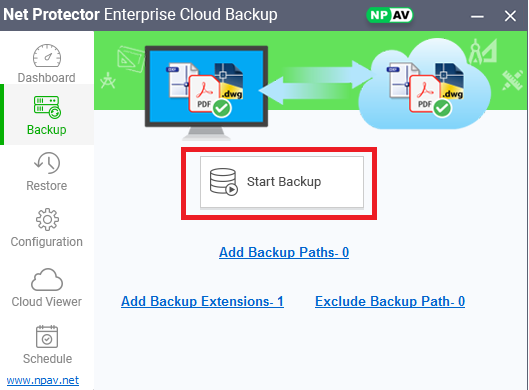
Step 12: Click on,Backup menu & Click on Add Backup Paths
And Add Backup Paths
Step 13: Click on Start Backup
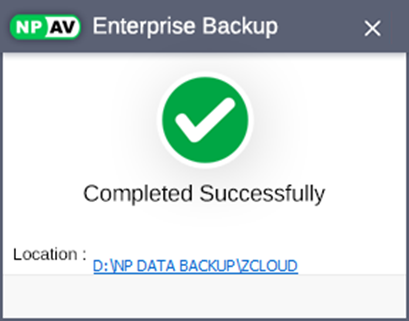
Step 14: Local Backup Completed Successfully
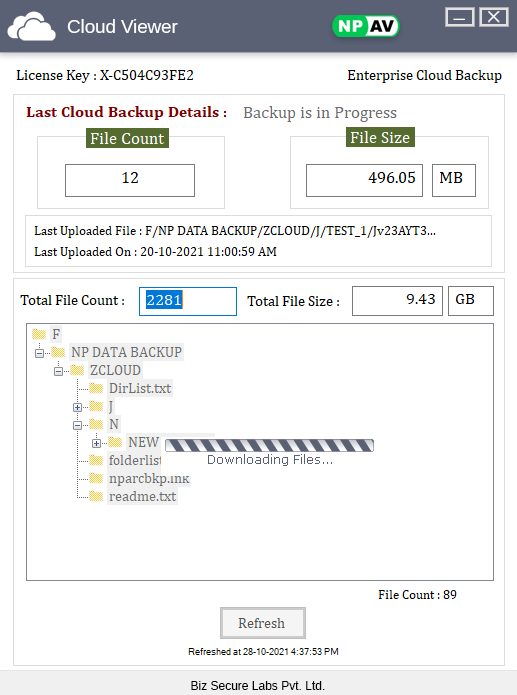
Step 15: Cloud backup will get started and its status will be displayed.
Step 16: On Desktop NPTBVIEWER Exe shortcut will be created automatically
Step 17: Click on save details,and submit
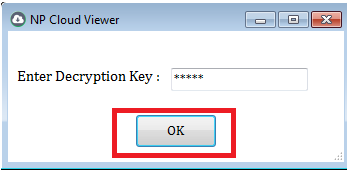
If Click on save details,then next time it will not ask to enter PIN it will directly download the data

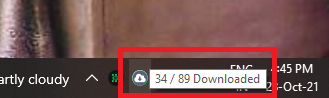
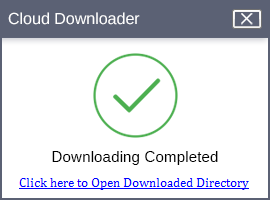
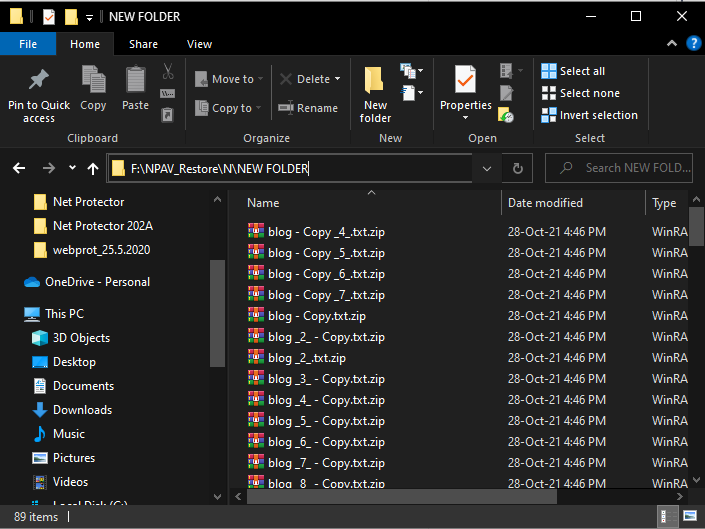
Step 18: Downloading Completed & click on “click here to open downloaded directory”
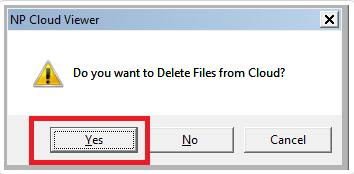
Step 19: Also We can delete the Cloud files from NPTBVIEWER.Exe
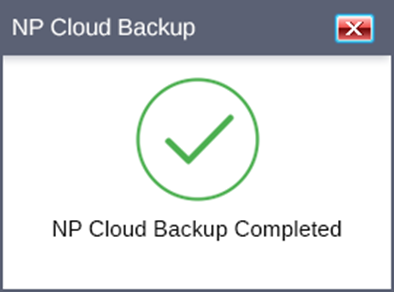
Once Cloud Backup Completed, then a message will display.

Thank You,
Cloud Back Up Team,
NPAV
