Atomic Time Setup – Installation Guide.
This Document Outlines the Steps to download,Install and Activate The Atomic Time client On your Pc
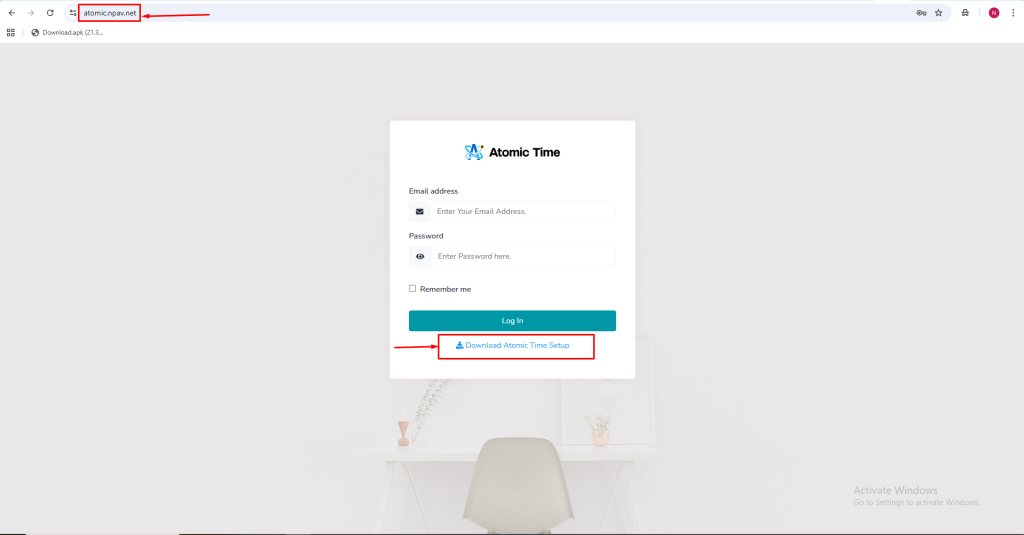
- ✅Step 1: Download the Setup
- Open your web browser.
- Go to https://atomic.npav.net/ .
- Click on “Download the Atomic Time Setup” to download the
atomicTimeInstaller.exefile.
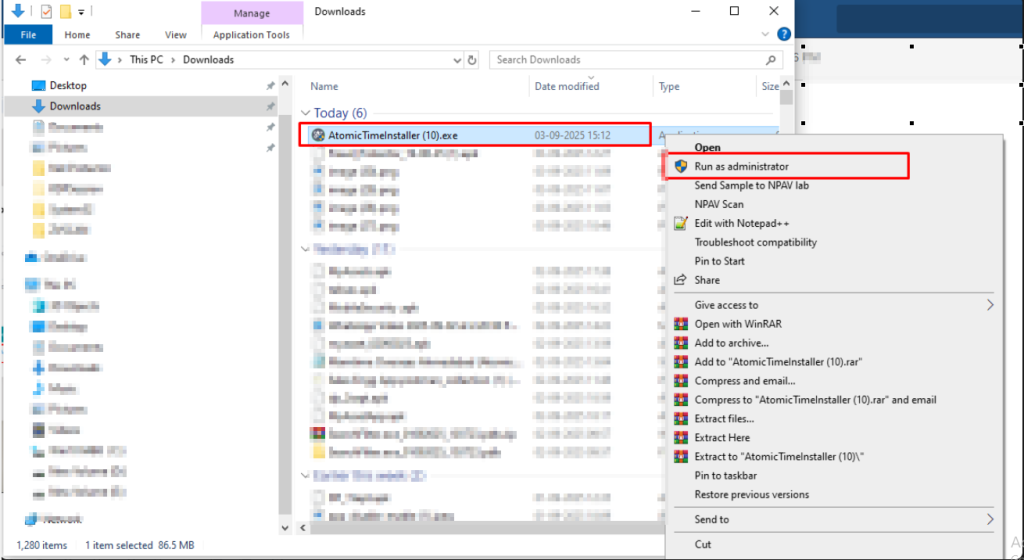
✅Step 2: Run the Installer
- Locate the downloaded
atomicTimeInstaller.exefile. - Right-click on the file and select “Run as administrator.”
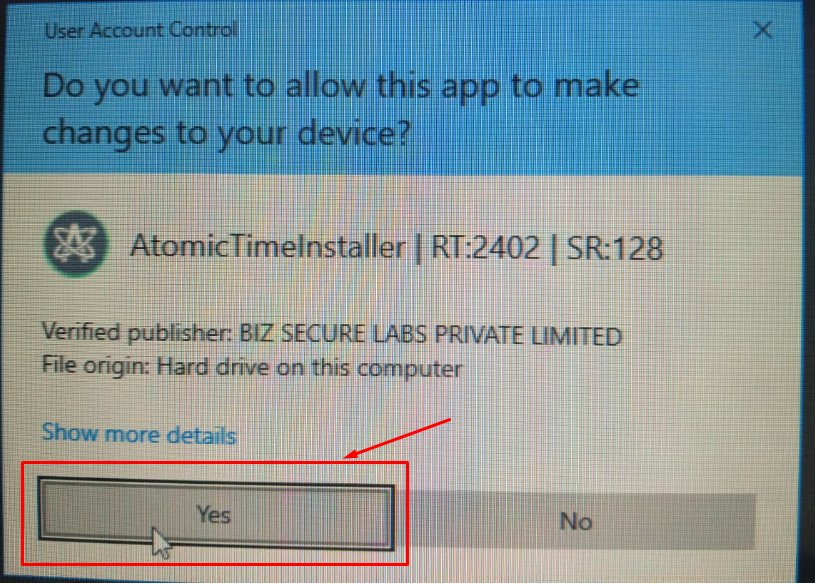
✅Step 3: User Account Control (UAC)
- When prompted by User Account Control, click “Yes” to allow the installer to make changes to your device.
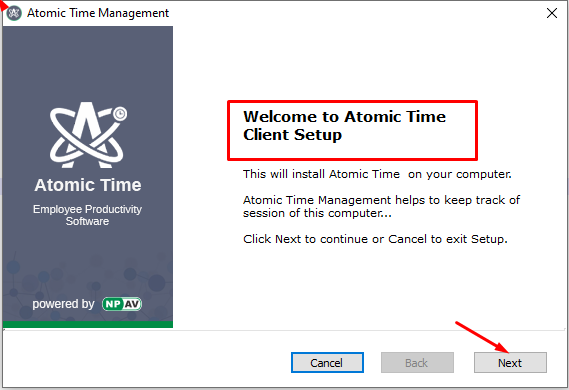
✅Step 4: Start the Setup
- The Atomic Time Client Setup window will appear.
- Click the “Next” button to continue.
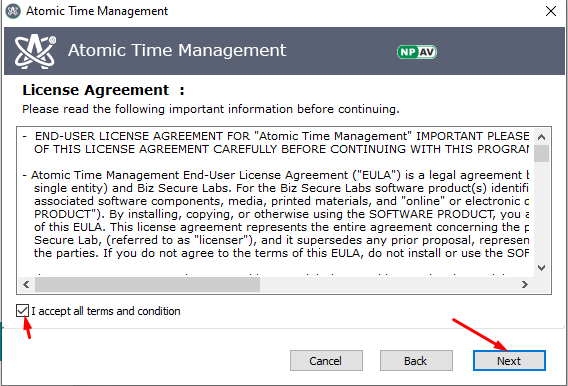
✅Step 5: Accept Terms and Conditions
- Read the license agreement.
- Select “I accept all terms and conditions.”
- Click the “Next” button.
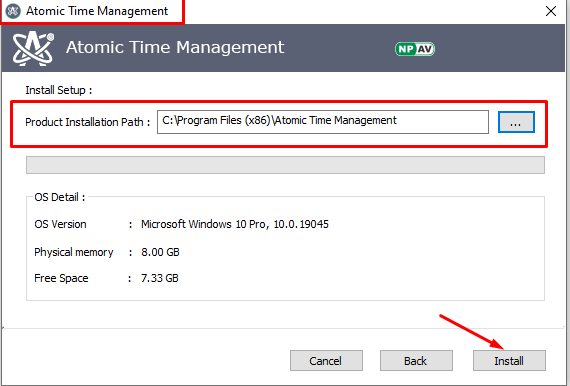
✅Step 6: Choose Installation Path
- Select the drive or folder location where you want to install Atomic Time.
- Click the “Next” button.
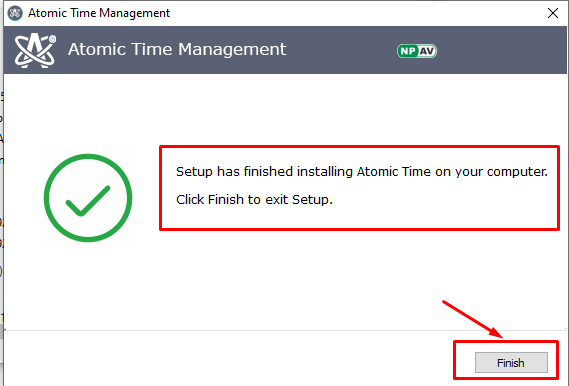
✅Step 7: Complete Installation
- Wait for the installation process to complete.
- Once finished, click the “Finish” button.
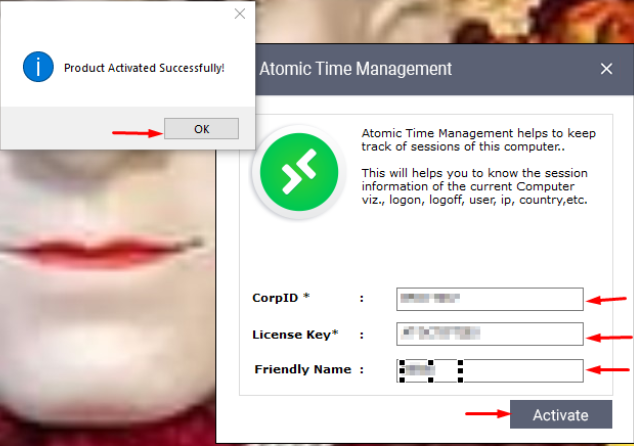
✅ Step 8: Activate the Product
- Launch the Atomic Time Client.
- Enter the following details:
-
- CorpID
- License Key
- Friendly Name
- Click the “Activate” button.
- You will see a message: “Product Activated Successfully.”
✅Installation and Activation Complete!
You can now start using the Atomic Time Client on your PC.
