How to Create Policy in Corporate Web Control
Administrators can easily create policy for different computers in the Organisation.
Steps for creating policy:
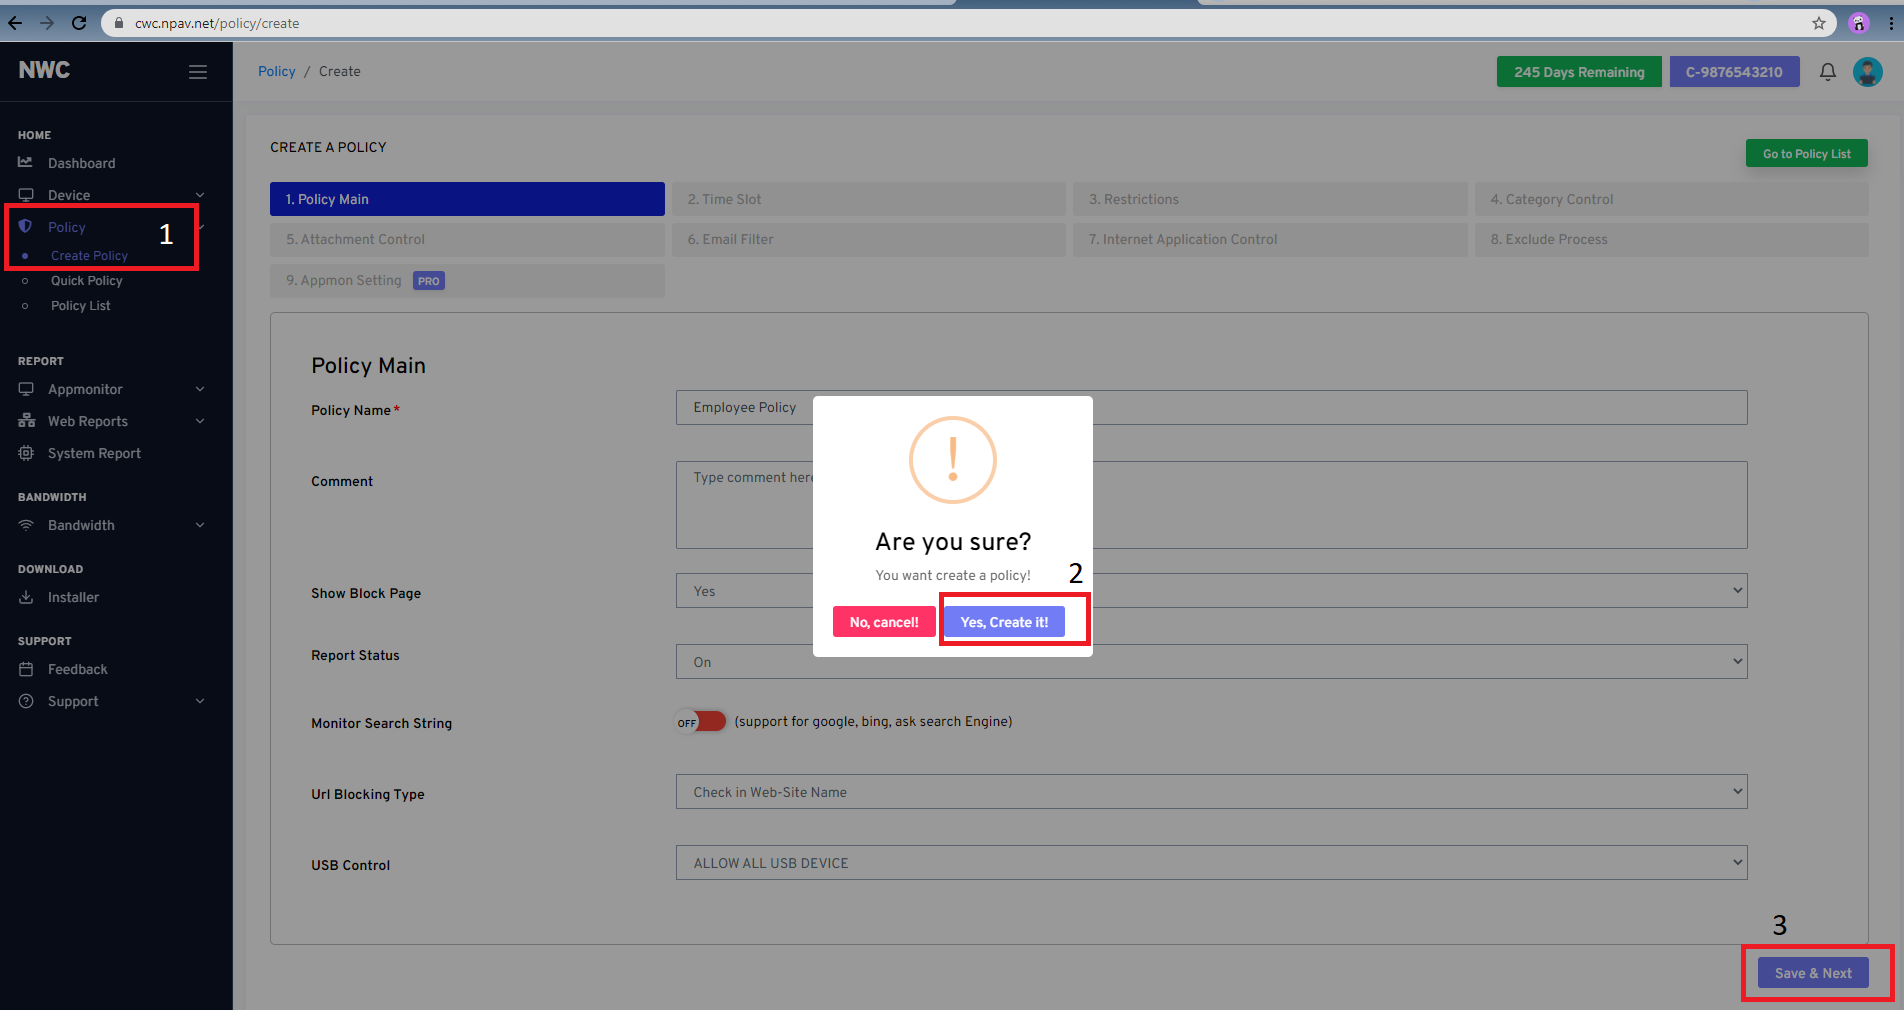
1.Create Policy
- Open Browser
- Login cwc.npav.net with valid credentials
- Create Policy >>Enter policy name >> Save
- Go to Time Slot tab
- Default Time slot is Always
- Click on save & Next button
2.Time Slot
- Go to Time Slot tab
- Choose Time slot Always / Specific
- As per time slot all policy is working
- Click on save & Next button

3.Restrictions
- Go to Time Restriction Tab
- Add URLs to Allow list
- Choose : // Default - Allow All // Default - Block All // allow all except Block List with Time Slot //Block all
except Allow List with Time Slot - Click on save & Next button

4 Category Control
- Go to Time Category Control Tab
- Default category control OFF For Allow All Policy
- OR Create Policy as Allow All & turn ON category control
- OR Add some URLs in Categories Exclude List. Exclude URLs get opened. Category check box are visible to tick
- Click on save & Next button

5.Attachment Control
- Go to Attachment Control Tab
- FTP, GMAIL, Web Whatsapp tick checklist for attachment control
- Add exclude List. Exclude FTP, GMAIL, Web Whatsapp get opened


6. Email Filter
- Go to Email Filter Tab
- Allowed / Blocked Email ID and ON / OFF Gmail Tracking.


7. Internet Application Control
- Go to Internet Application Control
- It Terminates the specified process like Process Name (e.g. utorrent.exe,firefox.exe,chrome.exe)


8.Exclude Process
- Go to Exclude Process
- Enter process name to exclude from filtering e.g. Tally.exe


9. Appmon Setting
- AppMon Setting table should visible to corp Web control Plus User.
- Default Screenshot & Application monitoring should be OFF


10.After click on Finish button Policy has been Created or Updated
